macOS Installation & Setup Guide
Follow each step below to install PCW Remote Support on your Mac and grant the permissions it needs. This should only take a couple of minutes.
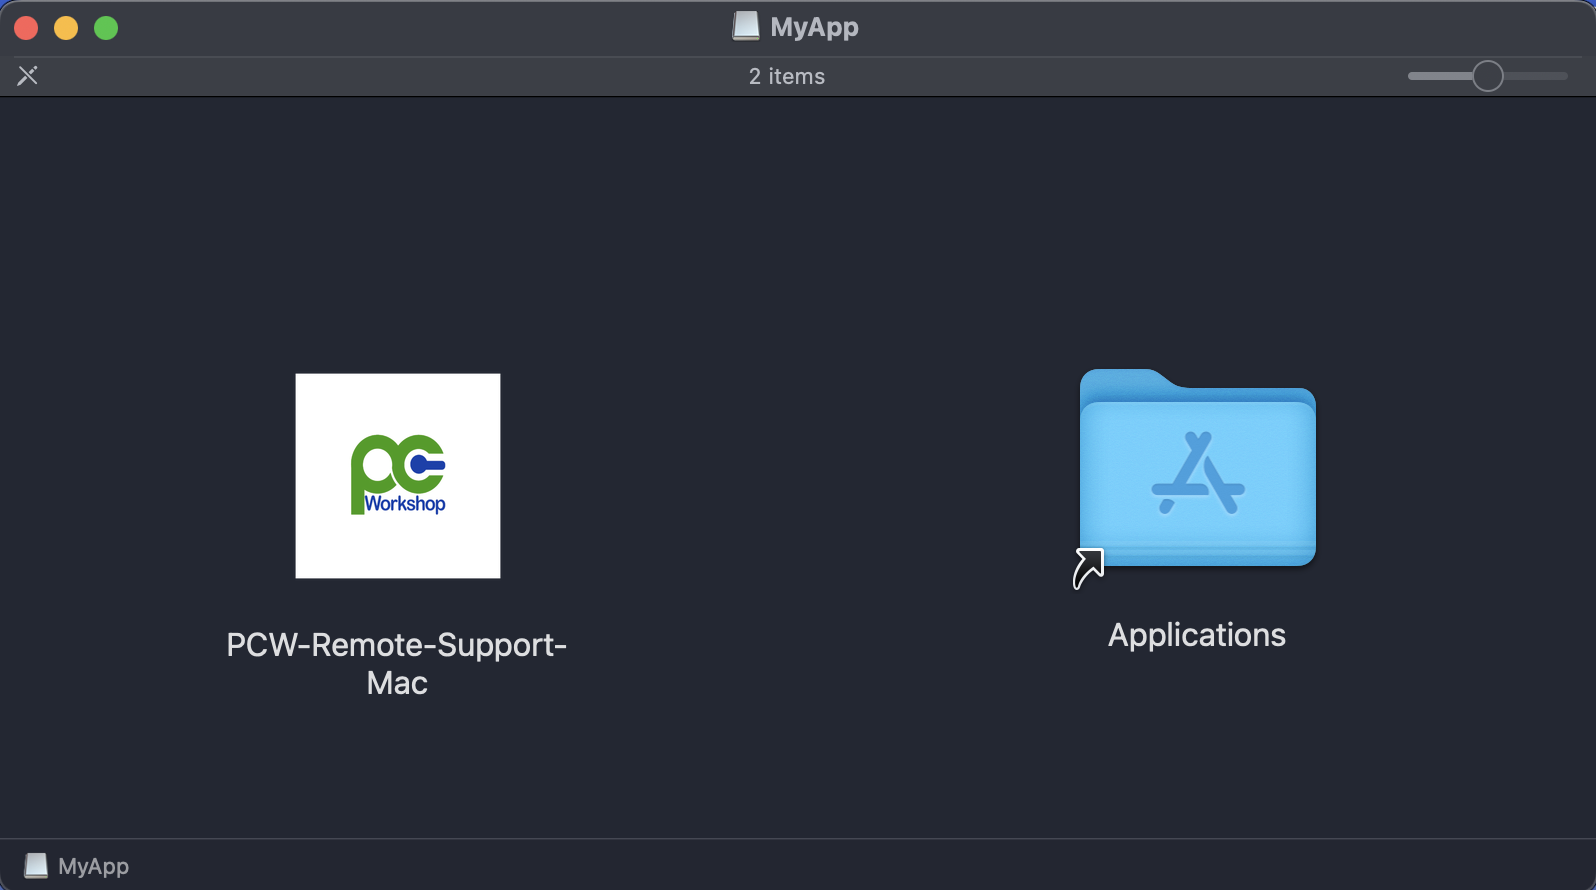
After downloading, open the .dmg file. You'll see a window with the PCW-Remote-Support-Mac app and an Applications folder. Drag the app icon into the Applications folder to install it.
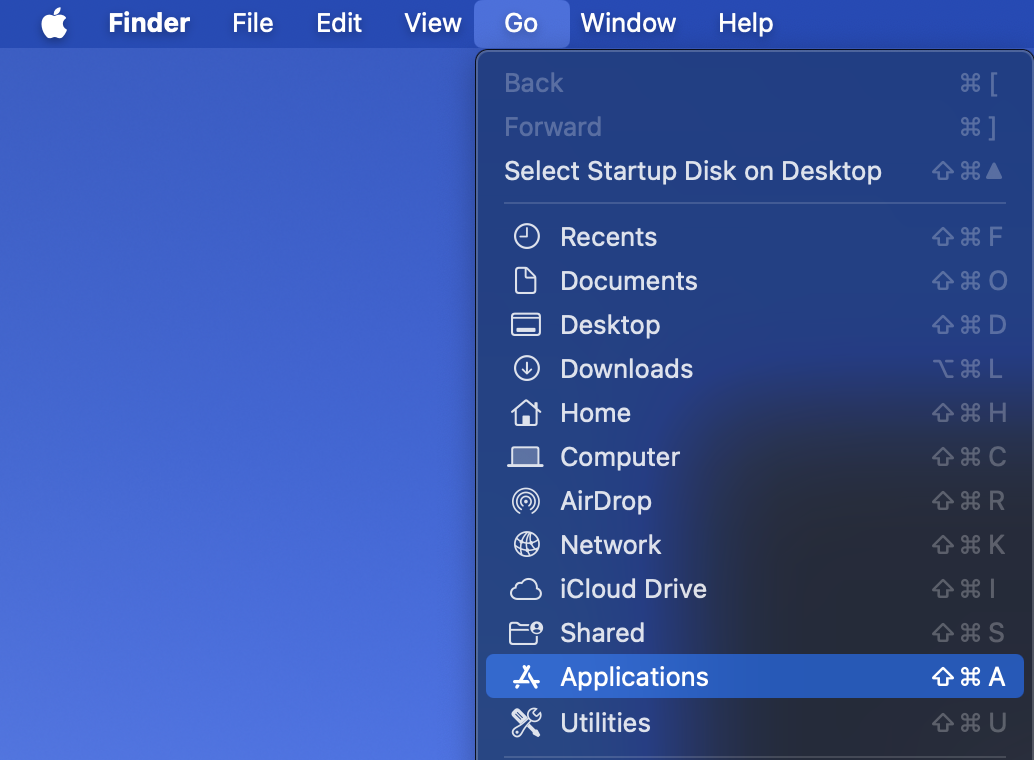
Open Finder, click Go in the menu bar, then click Applications. Find PCW-Remote-Support-Mac and double-click it to open.

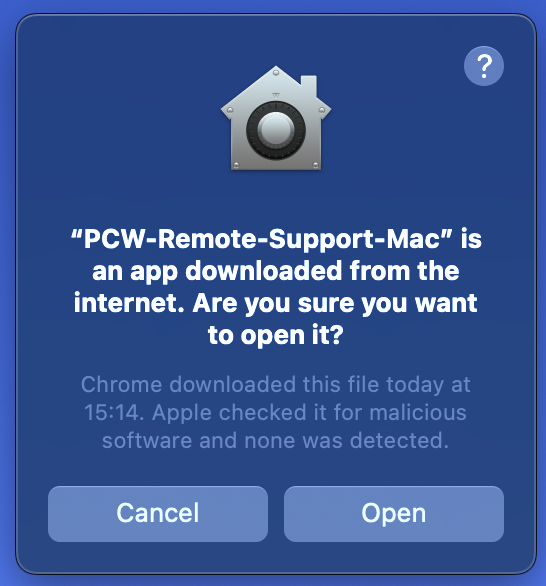
macOS will warn that the app was downloaded from the internet. This is normal. Click Open to continue.
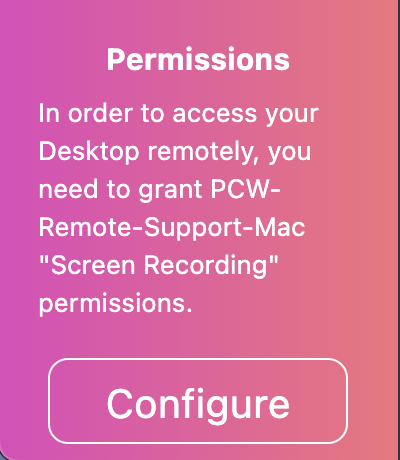
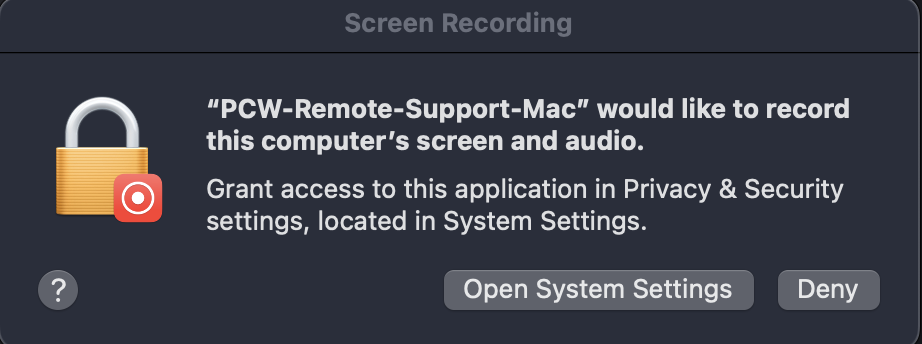
The app will ask for Screen Recording permission so your technician can see your screen. Click Configure when this prompt appears.
A system dialog will appear. Click Open System Settings.
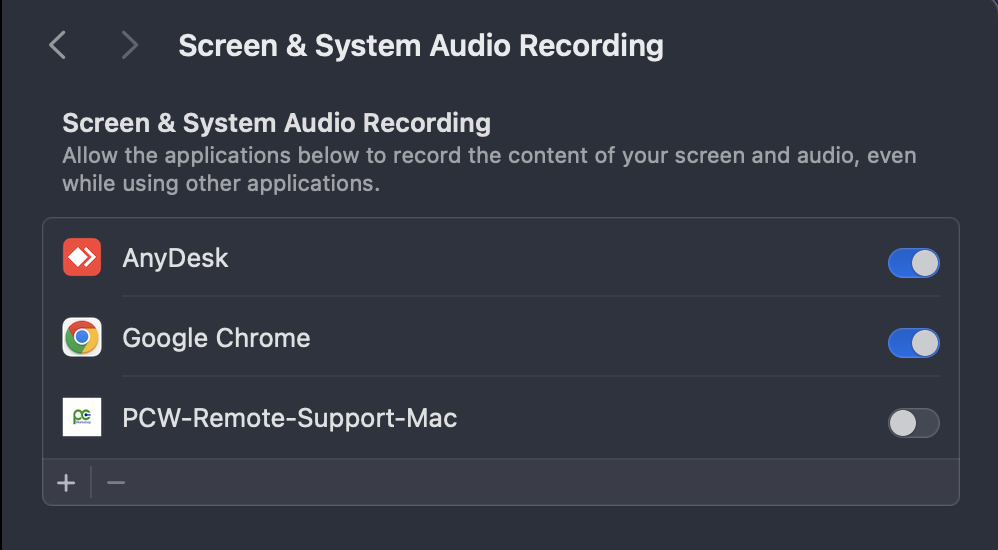
In System Settings, find PCW-Remote-Support-Mac in the list and toggle it on (the switch should turn blue).
macOS will ask you to confirm with your password or Touch ID. Enter your Mac login password and click Modify Settings.

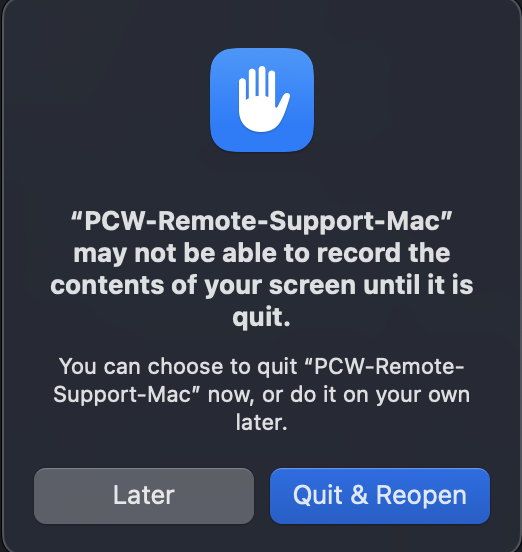
The app needs to restart for the new permissions to take effect. Click Quit & Reopen.
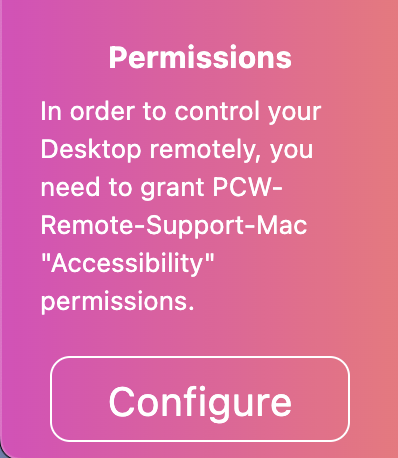
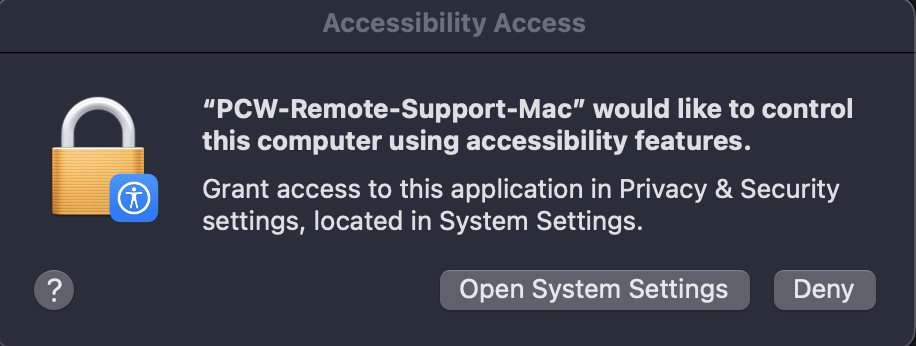
After reopening, the app will ask for Accessibility permission so your technician can control your mouse and keyboard. Click Configure.
A system dialog will appear. Click Open System Settings.
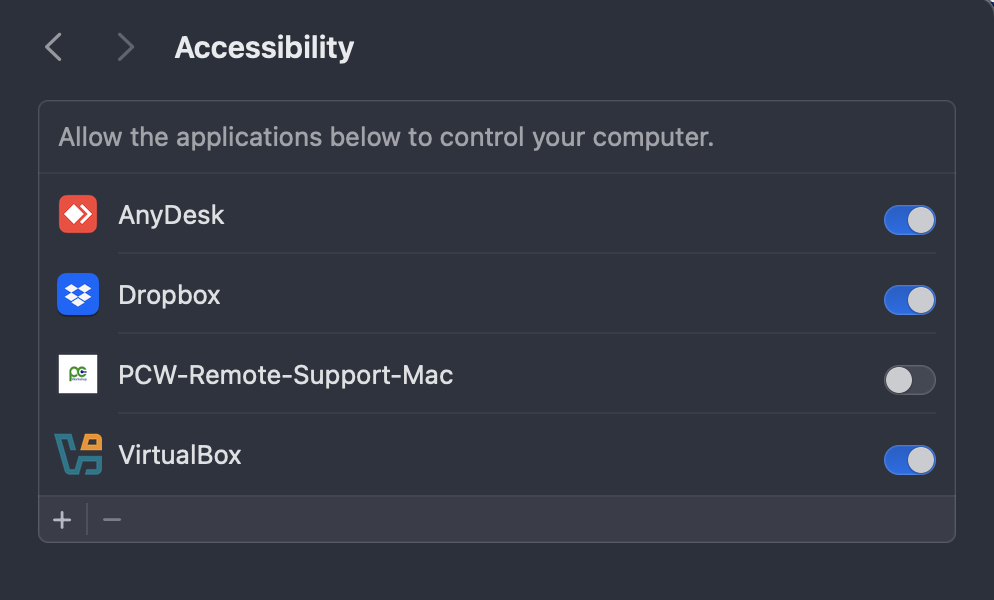
Find PCW-Remote-Support-Mac and toggle it on. You may need to enter your password again.
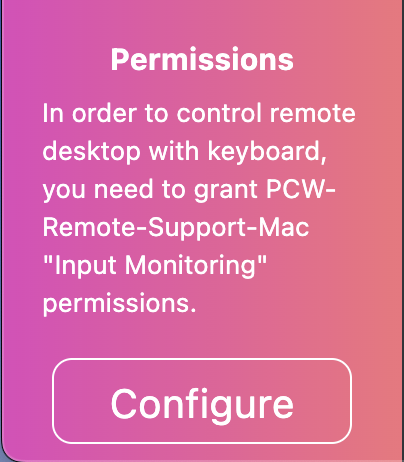
Finally, the app may ask for Input Monitoring permission for keyboard control. Click Configure and toggle it on in System Settings, just like the previous steps.
✅ You're all set!
The app will now show your ID and password.
Share these with your PC Workshop technician so they can connect and help you.